
List your first Amazon product wrong, and you will get zero sales while your competitors quietly steal every customer you should have won. That sounds harsh, but here is the good news: the listing process is not complicated once someone breaks it down for you. In fact, most sellers who fail on Amazon do not fail because the platform is too hard. They fail because nobody ever showed them the handful of settings that actually move the needle.
I am Travis Marziani. I have been selling on Amazon for over ten years, I have done more than $10 million in online sales, and I have helped thousands of students launch their own Amazon FBA businesses. Recently, I started an Amazon business in seven days, grew it to over $1.4 million in sales, and then sold it for $840,000. I am not sharing that to impress you. I am sharing it because everything I am about to walk you through is exactly what I do, every single time, on every single product.
By the end of this guide, you will know precisely how to create an Amazon listing that the algorithm rewards, that customers actually click, and that turns into consistent, compounding sales. Better yet, you will understand the secret settings buried in Seller Central that most new sellers scroll right past, even though those settings can double your organic reach.
Underneath all of it sits one framework: the Passion Product Formula. It is the approach that takes you from “just another private label seller” to a real brand with real customers, and I will show you exactly how it shapes every decision below.
- Set Up Your Amazon Seller Account
- Path 1 – How to Sell on an Existing Amazon Listing
- Path 2 – How to Create Your Own Amazon Listing From Scratch
- Write a Title That Games the Amazon Algorithm
- Choose the Right Product Category
- Set Up Variations Correctly
- Brand Name and Brand Registry
- Handling Overseas Payments Without Losing Money to Fees
- Get a Legitimate UPC Code
- Write a Product Description That Converts
- Master Your Bullet Points (Where Most Sellers Fail)
- Product Images (Your Most Important Asset)
- Product Details and Pricing Strategy
- The Hidden "All Attributes" Settings Most Sellers Miss
- The Final Step – Getting Inventory Into Amazon's Warehouse
- Why the Passion Product Formula Makes All of This Work
- Your Next 90 Days on Amazon Start Right Now
- Frequently Asked Questions
Set Up Your Amazon Seller Account
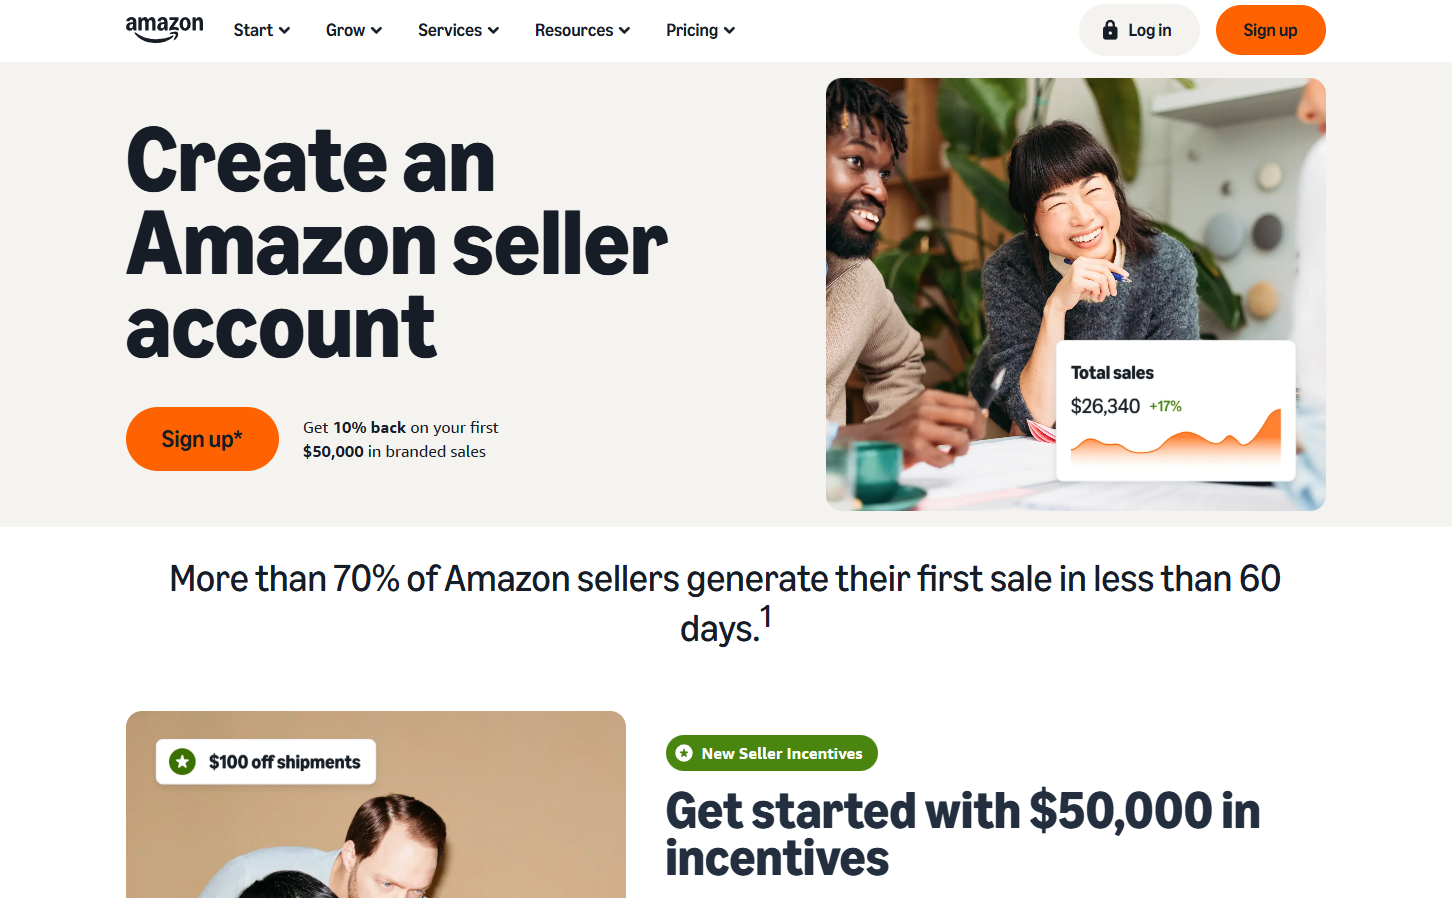
First things first: you cannot list anything until you have an account. Head over to sell.amazon.com and sign up for an Amazon seller account. The process is straightforward, and Amazon walks you through the required business and tax information step by step. Take your time here, because the details you enter now will follow you for the life of your business.
Once you finish signing up, log in. Amazon will drop you into the back end of the platform, which is called Seller Central. This is your command center. From here, you manage inventory, track sales, run advertising, and most importantly for today create your product listings.
To start listing, click the three lines in the upper corner of the screen, then click “Add Products.” That single click opens the door to everything that follows. Once you’re inside, however, you immediately face your first big decision, and how you answer it determines the entire path of your business.
The Two Paths of Listing on Amazon
Amazon gives you exactly two ways to list a product, and they lead to very different outcomes. The first path is selling another brand’s product. In this case, the product already exists on Amazon, which means a listing already exists too. You are not creating anything new. Instead, you simply add your offer to the existing listing and compete for the Buy Box alongside every other seller offering the same item.
The second path is selling your own unique product and building your own listing from scratch. This is where the real money on Amazon gets made, because you control the brand, the pricing, the images, the keywords, and the customer relationship. Nobody can undercut you on your own listing, because nobody else is on it.
Even if you already know you want to build your own brand, stick with me through the first path anyway. Understanding how existing listings work will make the second half of this guide click much faster, especially when we get into fulfillment and pricing.
Path 1 – How to Sell on an Existing Amazon Listing

Let’s say you want to sell a product that already exists on Amazon. To start, simply type the name of the product into the search field. For this example, imagine you are selling individual Liquid IV hydration packets. Type that in, click submit, and Amazon will return a list of matching listings.
Next, find the listing that matches your exact product. Precision matters here. If you are selling a single-serving packet, do not attach your offer to a 16-count box. Click into the correct listing, and Amazon will ask you to fill out a short set of details. It starts with condition. Since this is a consumable product, “new” is the only available option. If you were selling something like textbooks, however, you would also see a “used” option.
After that comes quantity. If you have five packets to sell, enter five. Then Amazon asks for your price. You can set this to whatever you want, though obviously, if you price too high, nobody buys. Suppose the current price on the listing sits at $7.49. You can match that exactly, or you can drop to $6.99 if you want to move units faster.
But before you finalize anything, there is one decision that matters more than all the others combined.
FBM vs. FBA – The Most Important Decision You’ll Make
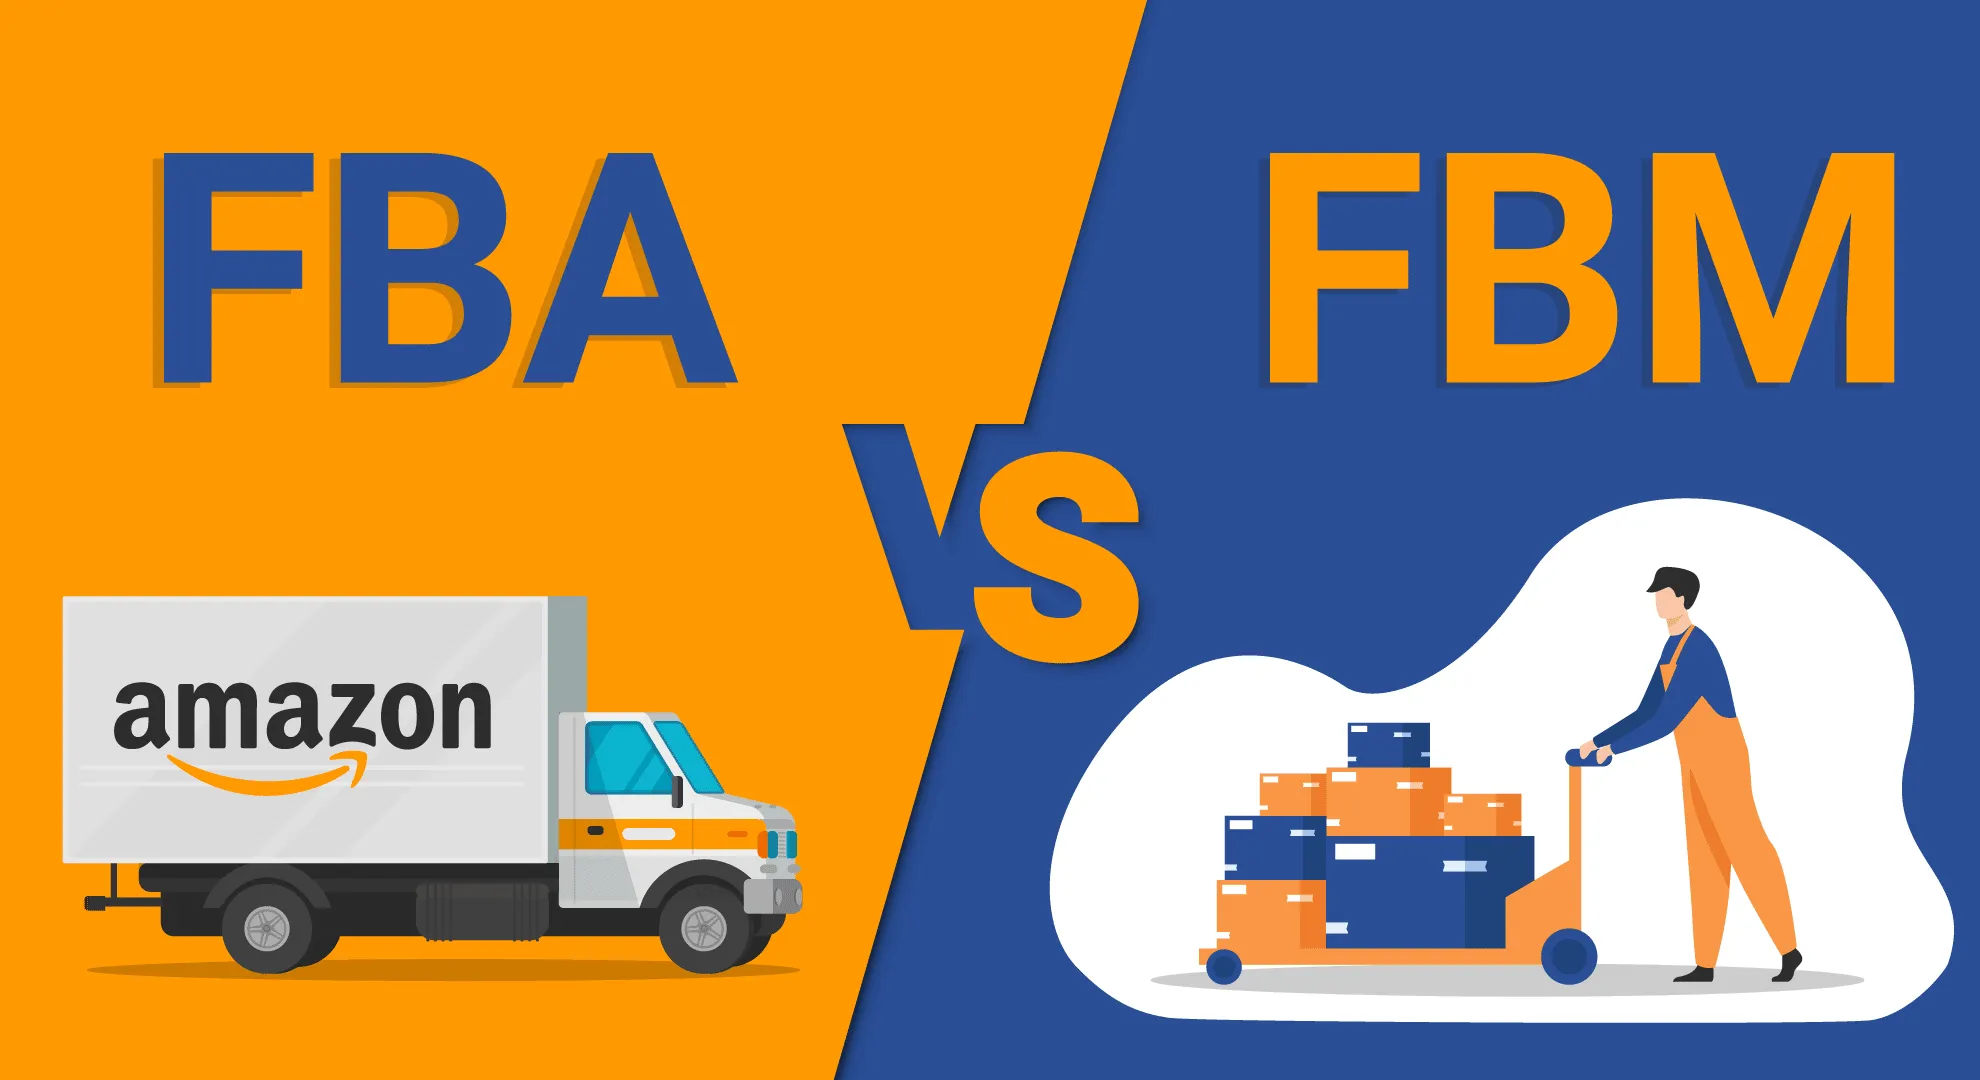
Amazon asks you to pick a fulfillment channel, and this single choice shapes your workload, your margins, and your visibility. The first option is “I will ship this item myself,” which the industry calls FBM, or Fulfilled by Merchant. Under FBM, every time a customer orders, you personally pack the product, print the label, and ship it out. That means storage costs, packing materials, trips to the post office, and hours of your life you will never get back. Worse, your product does not become Prime eligible.
The second option is FBA, or Fulfilled by Amazon, and this is what I recommend for nearly every seller. With FBA, you send all your inventory into Amazon’s warehouse in one shipment. From that point forward, Amazon picks, packs, ships, and handles customer service on every single order. You wake up, sales have happened, and you did nothing.
Here is why this matters so much. Amazon has over 300 million Prime customers around the world. Those are 300 million people who pay Amazon every single year specifically so they can get two-day shipping. When they search for a product, they almost always buy the Prime option if one exists. Therefore, if your product is not Prime eligible, you are losing to every competitor who is. It really is a no-brainer.
To activate FBA, select “Amazon will ship and provide customer service,” scroll down, and click “Save and Finish.” Then click “List as FBA” and send your inventory in. That is genuinely all it takes, and it is what makes passive income on Amazon possible in the first place.
Path 2 – How to Create Your Own Amazon Listing From Scratch
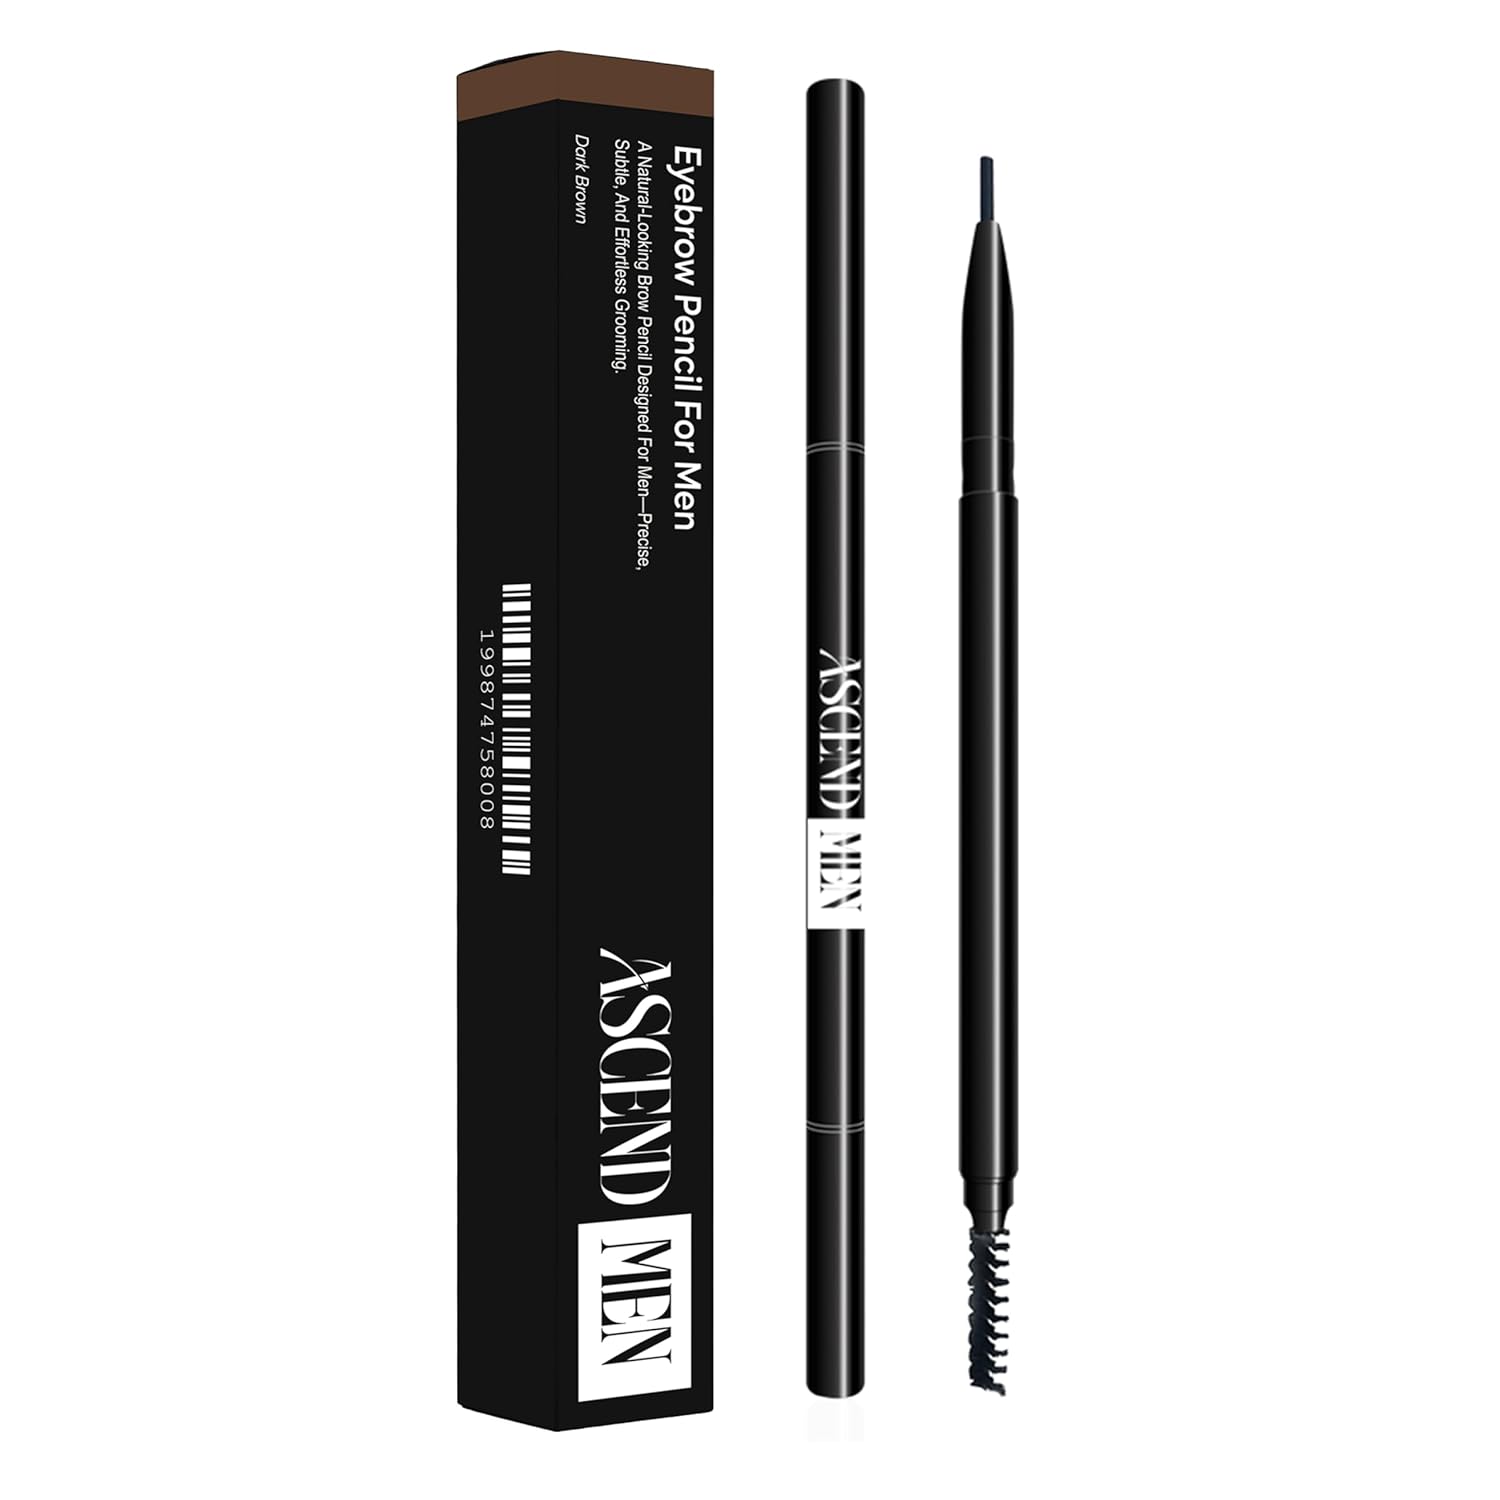
Now for the good part. To build your own listing, click “Blank Form” and then click “Start.” Instead of walking you through this with a made-up example, I am going to use a real product that we are actively launching in 2026: an eyebrow pencil for men, sold under the brand Ascend Men.
Look closely at what we did with this product, because it explains everything. We did not invent a new category. Eyebrow pencils already exist, and they sell extremely well. Instead, we took an existing product with proven demand and niched it down to a specific, underserved demographic. Right now, virtually every eyebrow pencil on Amazon is designed, packaged, and marketed toward women. Yet plenty of men buy and use them anyway. So we built the perfect version for that overlooked subset of buyers.
That is niche branding, and it beats generic private label every single time. When you sell a generic product, your only lever is price, and price wars have exactly one winner: Amazon. But when you build the ideal product for a specific person, you compete on relevance instead of cost. You can charge more, convert better, and build actual brand loyalty.
This is the heart of the Passion Product Formula. Rather than chasing whatever product a software tool tells you is trending, you build a brand around a niche you understand, in a market with proven demand and weak, lazy competition. Every step that follows becomes dramatically easier when you start from that foundation.
Write a Title That Games the Amazon Algorithm

The very first question Amazon asks on a new listing is the item name, which becomes your product title. Do not rush this. Your title is the single most important signal Amazon uses to figure out what your product is and, more importantly, who to show it to. Get it right, and you can genuinely game the search algorithm and rank at the top of your category. Get it wrong, and your product sits on page ten where absolutely nobody will ever find it.
For the eyebrow pencil, our title reads: “Eyebrow Pencil for Men, Natural Looking Brow Pencil, Precise, Subtle, and Effortless Grooming, Dark Brown.” Notice how it packs in keywords while still reading like something a human wrote. That balance matters, because your title appears directly on the live listing. Shoppers see it. So while you are optimizing for the algorithm, you still need it to look natural.
Here is the underlying logic. Customers search for what they want, and Amazon has to decide which of its millions of products to surface. Your job is simply to make that decision easy. You do that by loading the right keywords into your title, with the most important ones placed first. Thousands of people search “eyebrow pencil for men” every month, so those four words sit at the very front of our title. When somebody types that phrase, Amazon instantly knows our product is the answer.
And ranking first is not a small advantage. It is everything. The number one product captures the overwhelming majority of sales. Second place gets considerably less. Third place gets less still. The drop-off is exponential, not linear. In fact, the number one listing typically generates more revenue than positions two through ten combined.
How to Find the Right Keywords

Naturally, all of this raises a question: how do you actually know what people are searching for? Fortunately, there is a tool that hands you that exact data. It is called Helium 10, and I use it every single day. They offer a free plan, and they also run a seven-day free trial if you want to test the paid features. If you decide to upgrade, I have a discount code that will save you real money.
Inside Helium 10, the tool you want is Magnet. Start by typing in the main phrases you believe customers use when they look for your product. For us, the two obvious candidates were “eyebrow pencil for men” and “men’s brow pencil.” Magnet came back and confirmed that “eyebrow pencil for men” pulls thousands of searches per month. That is a fantastic sign, because it means thousands of people are actively hunting for this product right now.
Even better, when we searched that exact phrase on Amazon, the results were mostly generic eyebrow pencils that were never designed or marketed for men in the first place. Demand exists, but nobody is properly serving it. That gap is the entire opportunity, and it is exactly why launching a niche-branded passion product remains one of the best paths to serious income online.
Magnet also surfaces adjacent phrases you never would have guessed. In our case, it returned “natural brow pencil,” “men’s grooming pencil,” “subtle brow pencil for guys,” and a dozen more, all with meaningful search volume. From there, we pulled the most relevant terms and worked as many as possible into the title and bullet points without letting it sound spammy.
The Competitor Keyword Hack
Before you finalize your title, run one more play. Go look at the top-ranked products in your category and any closely related categories. Scroll through their titles, their bullets, and their descriptions, and pull out any keywords they are using that you missed.
The logic is simple. Top sellers did not guess. They tested. So if ten of the best-selling grooming products all include “professional grade” in their titles, that phrase is almost certainly pulling real search traffic. Consequently, you should probably use it too.
Think of this as free competitive research. Your competitors already spent the time and money figuring out what converts, and they left the answers sitting in plain sight on their own listings. Take what works, then combine it with the gaps they left open.
Choose the Right Product Category

Once your title is dialed in, Amazon has a clear picture of what you are selling, which makes the next step easier than most people expect. Amazon will automatically select a product category based on your title, and honestly, it gets this right most of the time.
If Amazon picks the wrong category, however, you can simply type in the correct one yourself and choose the best match from the dropdown. Do not overthink it, but do not ignore it either, because your category determines which best-seller rankings you compete in and which shoppers ever see you.
When you are genuinely unsure, use the safest possible method: look at where your top competitors are listed and copy that. If the products currently winning your keyword all sit in the same category, that category is working.
That said, category selection can get far more strategic than “copy the competition.” There are ways to choose a category specifically to rank faster and reach the top with fewer sales. That level of strategy is something I teach directly inside my mentorship program, the Passion Product Accelerator, where you also get a dedicated coach, one-on-one strategy sessions, and small group coaching with me and my team.
Set Up Variations Correctly
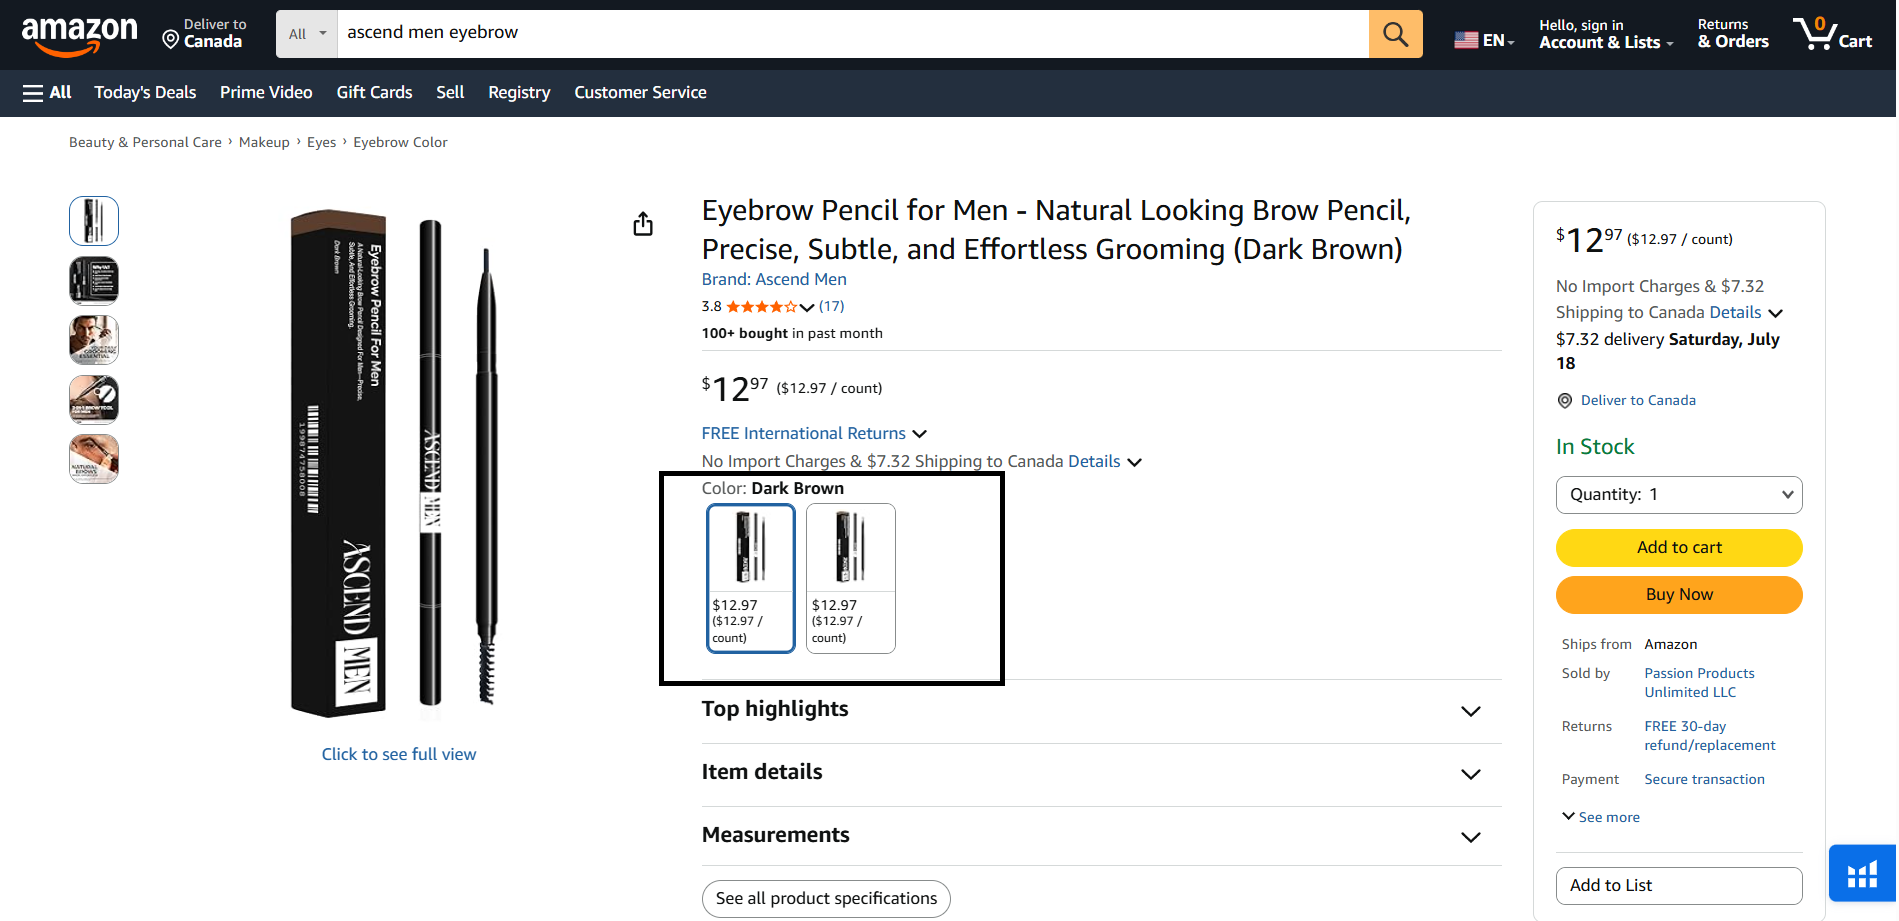
Next, Amazon asks about variations. This is simply where you tell the platform whether your product comes in multiple sizes, colors, or flavors. For the eyebrow pencil, the answer is yes. We sell three colors: dark brown, light brown, and black. Each color becomes its own variation living under a single parent listing.
Variations are powerful because they consolidate your traffic. Instead of three separate listings splitting sales and reviews, one listing captures everything and presents shoppers with options. As a result, you rank faster and convert better.
However, watch out for a significant change. Amazon recently updated how reviews are shared across product variations. Starting in 2026, reviews only get shared between variations with minor differences, such as color. If your variations differ significantly in features or function, they no longer share reviews at all.
Therefore, plan your entire product line with this rule in mind. Group variations that are genuinely similar so they compound your social proof, and keep meaningfully different products on separate listings where they belong.
Brand Name and Brand Registry
After variations, Amazon asks for your brand name. If this is your product, enter your brand here. Even if a third-party manufacturer physically produces the item, you still put your brand name in this field, because you own the brand.
But here is something crucial that many new sellers skip. If you plan to use your own brand name on Amazon, you need to file a trademark. Fortunately, this is far easier and more affordable than most people assume. You can file directly through uspto.gov, and once your application is filed, you provide Amazon with your trademark case number. Amazon then approves you for Brand Registry.
Do not treat this as optional. Brand Registry is one of the highest-leverage moves available to a new seller, and the small trademark cost pays for itself many times over.
Why Brand Registry Is Worth Every Penny
Brand Registry unlocks a stack of advantages that generic sellers simply cannot access. First, it gives you A+ Content, which lets you add rich images, comparison charts, and formatted modules directly into your product description. Shoppers spend more time on the page, understand your product better, and convert at higher rates.
Second, brand-registered products receive priority placement in Amazon search. Amazon trusts registered brands more than anonymous generic listings, and the algorithm reflects that trust in your rankings.
Third, Amazon actively takes down knockoff listings on your behalf. When copycats inevitably show up trying to ride your success, you have a real enforcement mechanism instead of a support ticket and a prayer. On top of that, Brand Registry makes shipping inventory into Amazon significantly easier.
In short, if you are serious about building a real brand rather than flipping commodities, Brand Registry is not a nice-to-have. It is the foundation that protects everything you build on top of it.
Handling Overseas Payments Without Losing Money to Fees

Before we move on to the technical fields, there is something worth setting up now rather than later. Once you start working with manufacturers, especially overseas ones, you will be sending international transfers, dealing with currency conversions, and getting hit with transfer fees that quietly eat into your margin. Multiply that across every purchase order, and it adds up fast.
This is why I personally use Airwallex. With Airwallex, you can hold global accounts with local bank details in 20+ currencies, which means you can collect your Amazon payouts like a local business in multiple markets instead of getting crushed by Amazon’s currency conversion spreads. You can set up a global account in minutes.
Instead of juggling separate bank accounts, tools, and platforms just to run your Amazon business, Airwallex consolidates it into one dashboard. You can collect payments, manage multiple currencies, pay your suppliers, and keep everything organized in a single place.
Honestly, once your Amazon business starts growing, having these systems set up properly saves an enormous number of headaches later. If you are working with overseas suppliers or planning to sell in multiple marketplaces, it is worth checking out. I will leave a link in the description.
Get a Legitimate UPC Code

Now Amazon asks for an external product ID. You have a few options here, including UPC, EAN, ISBN, and ASIN, but for the vast majority of physical products, you will use a UPC. UPC stands for Universal Product Code, and it is the barcode scanned at checkout in every Walmart, Target, and grocery store in the country. Practically every product on earth has one.
If you are selling your own unique product, you must buy your own UPC code, and you should buy it directly from GS1 at gs1.org. GS1 is the official issuing body, and they recently started offering single UPC codes for around $30. In the past, they forced you to purchase packs of ten, so this is a genuine win for new sellers.
Be careful, though, because plenty of websites will happily sell you cheaper UPC codes for around $10. Avoid them. Sometimes those codes are not legitimate at all and simply will not work. Even when they do function initially, they frequently cause problems down the line. Your listing can get flagged or suspended, and untangling that mess is a nightmare you do not want.
Look at it this way: $30 is remarkably cheap insurance for an asset you plan to build into a real business. Pay it, get a legitimate code, and move on with your day.
Write a Product Description That Converts
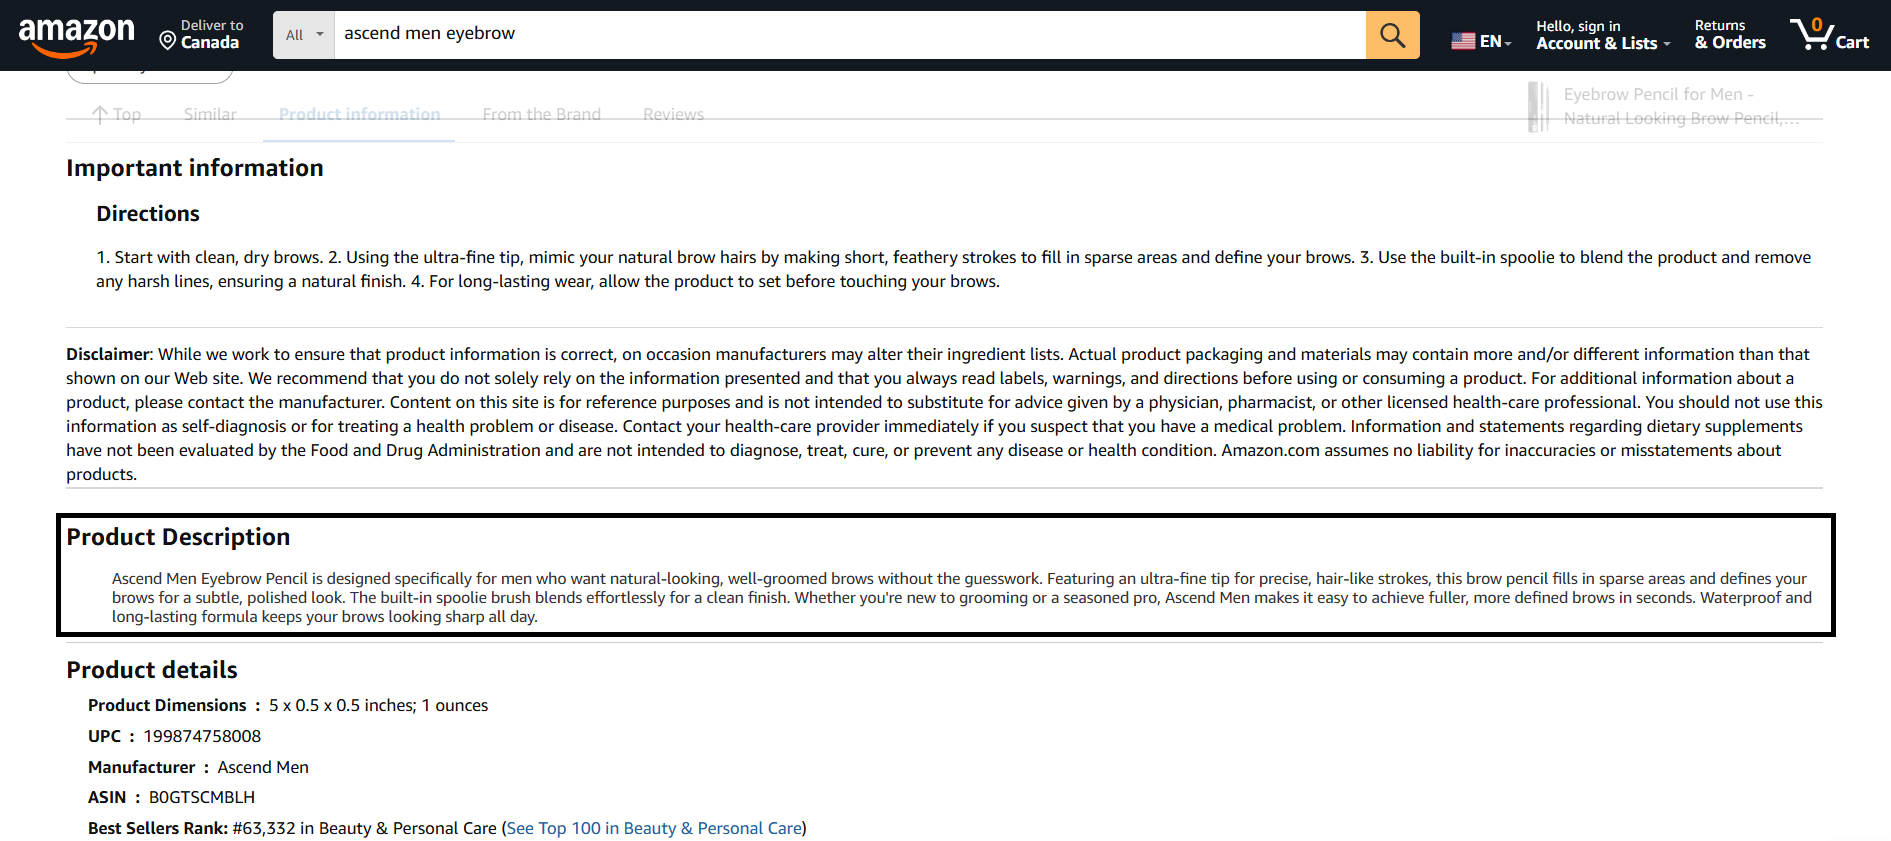
With the technical fields handled, the product description section opens up. This is the paragraph where you tell people why they should actually buy. For the eyebrow pencil, here is roughly how ours reads:
“Ascend Men Eyebrow Pencil is designed specifically for men who want natural-looking, well-groomed brows without the guesswork. Featuring an ultra-fine tip for precise, hair-like strokes, this brow pencil fills in sparse areas and defines your brows for a subtle, polished look. The built-in spoolie brush blends effortlessly for a clean finish. Whether you are new to grooming or a seasoned pro, Ascend Men makes it easy to achieve fuller, more defined brows in seconds. The waterproof, long-lasting formula keeps your brows looking sharp all day.”
I gave you that example because it accomplishes three things simultaneously. It leads with benefits rather than specs, it naturally weaves in the keywords we researched, and it speaks directly to the customer using the exact language they would use themselves. Every strong description does all three at once.
But the section immediately below this one is where most new sellers quietly lose the sale.
Master Your Bullet Points (Where Most Sellers Fail)

Your bullet points are the very first thing a customer reads after clicking into your listing. They sit right at the top of the page, above the fold, next to your images. In other words, they carry an enormous amount of persuasive weight, and yet most sellers treat them as an afterthought.
The single biggest mistake new sellers make is listing features instead of benefits. Nobody buys a feature. People buy the outcome that feature creates for them.
Structurally, every bullet works the same way. You open with a short, benefit-driven phrase in all caps on its own line, then you expand on it in one clear sentence underneath. Amazon technically says not to use all caps in bullets, but everyone does it anyway, and it makes your bullets stand out dramatically against the boring competitors who play by the rules.
The 5-Bullet Framework
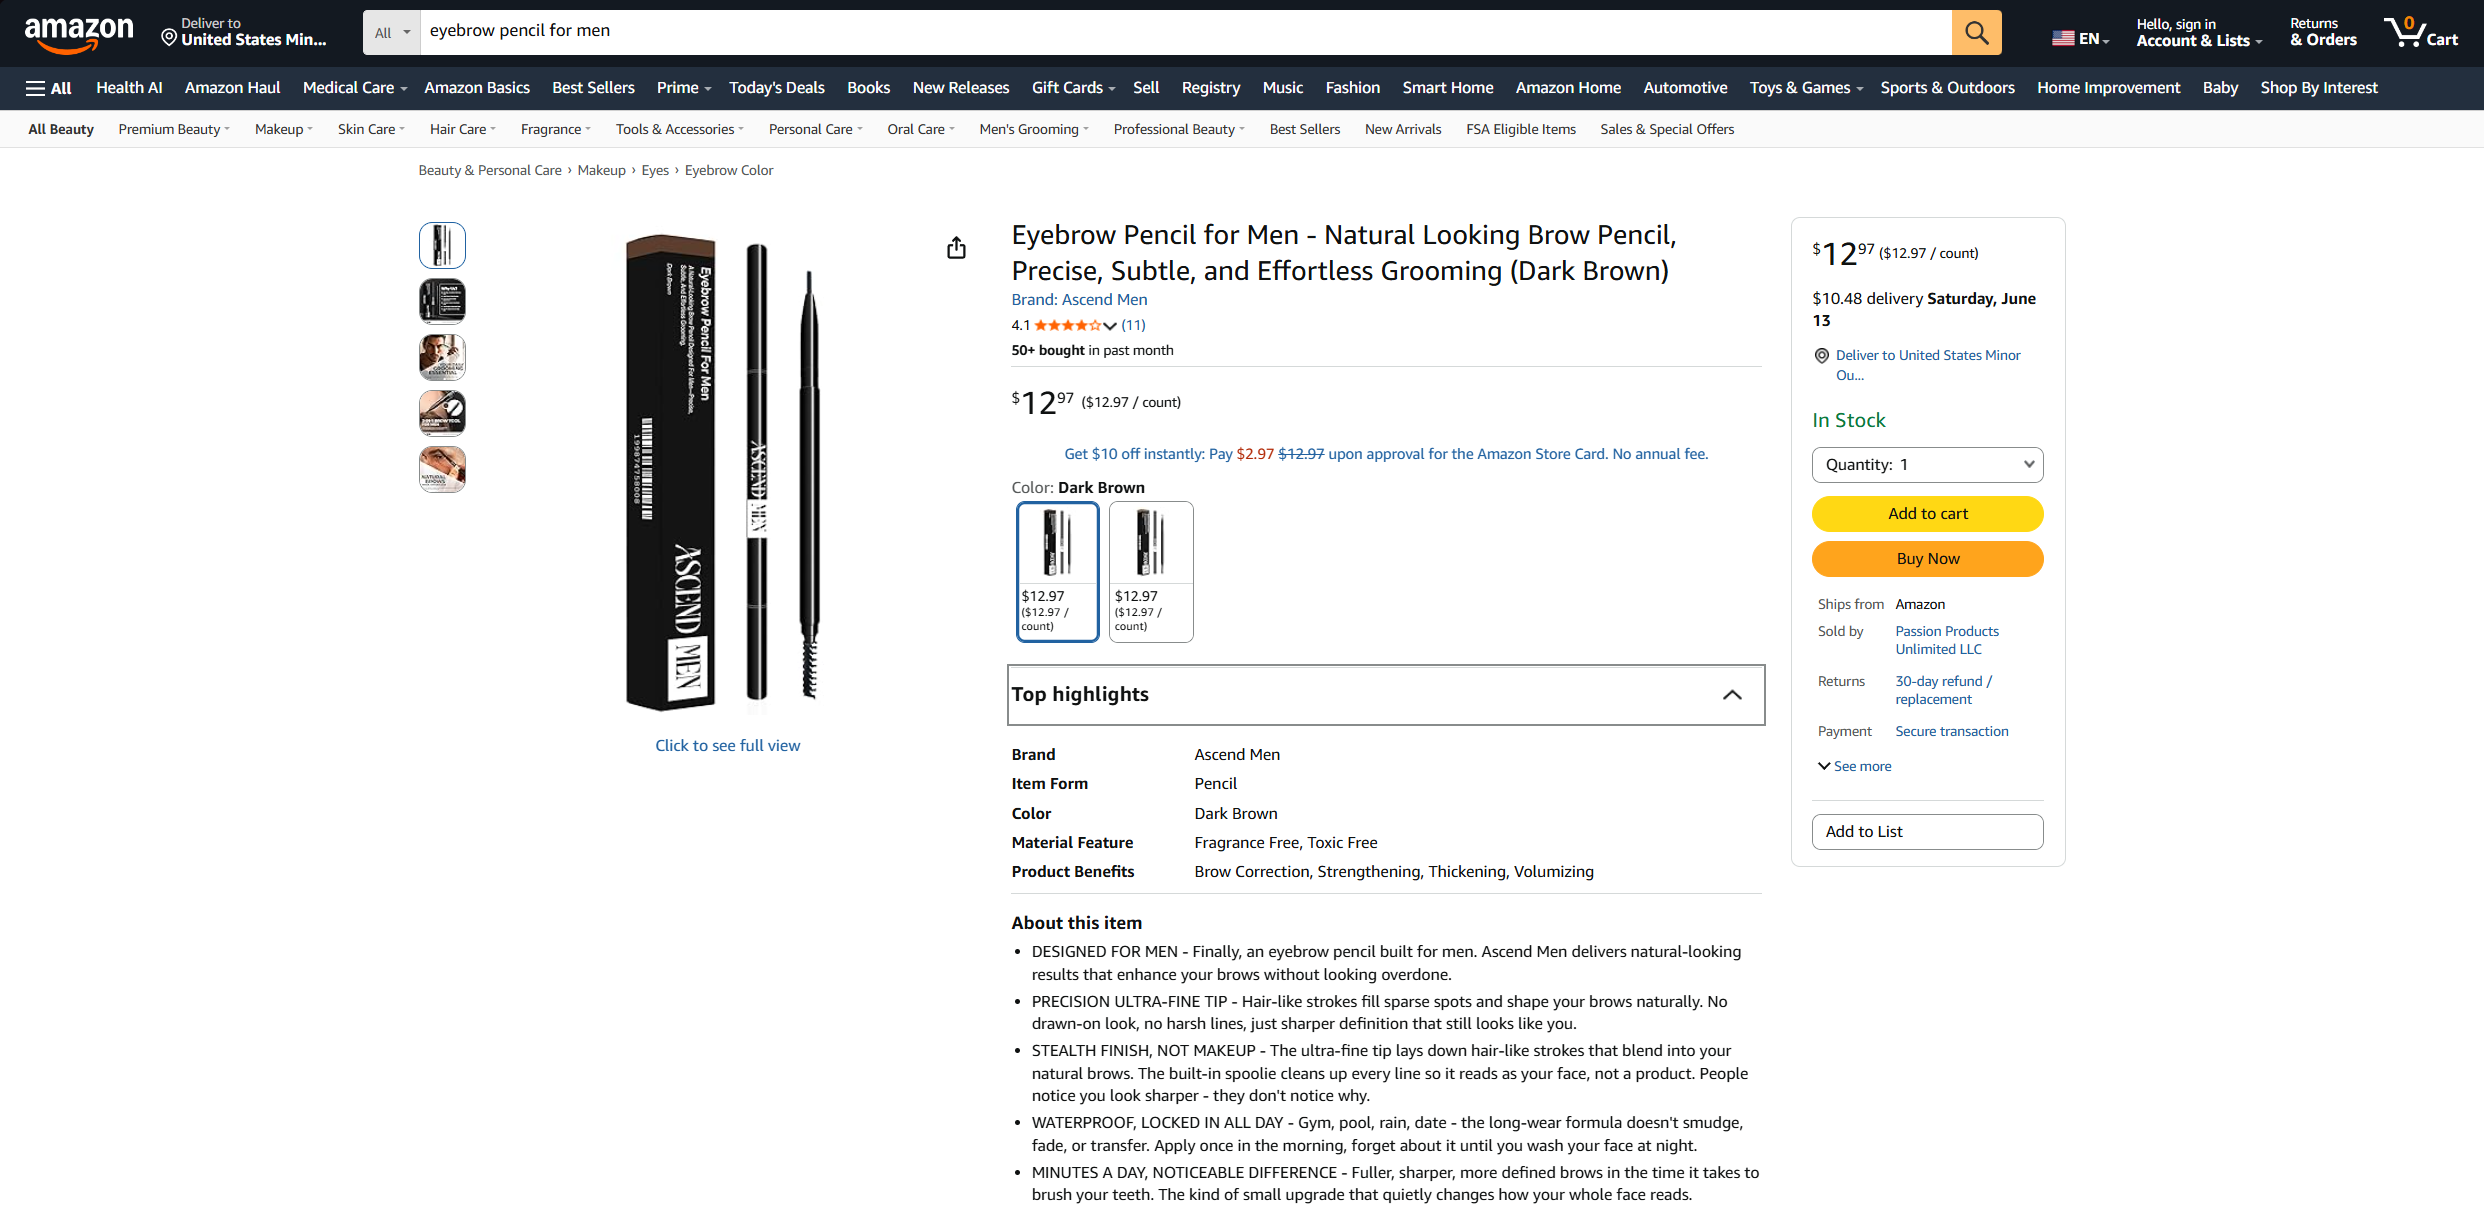
Here is the exact framework I use on every listing. Bullet one combines your main keyword with your biggest benefit. For the eyebrow pencil, it reads: “NATURAL-LOOKING BROW PENCIL FOR MEN, Designed for sharp, natural-looking brows that fill in sparse areas in seconds. No tutorial required.” Bullet two hits a completely different reason to buy, bullet three addresses durability and quality and bullet four covers ease of use. Finally, bullet five presents your money-back guarantee, which I always recommend including because it removes the last bit of purchase friction.
Five bullets, five distinct angles, five different reasons to say yes. That variety matters, because different customers buy for different reasons, and you want to catch all of them.
Above all, obsess over benefits. Steve Jobs demonstrated this perfectly when he launched the iPod. He could have said “one gigabyte of storage,” which was the technical feature. Instead, he said “a thousand songs in your pocket.” Nobody cared about the gigabyte. Everybody understood the pocket.
The encouraging part is that most of your competitors are lazy here. They dump specs into their bullets and call it done. That leaves enormous ground for you to take, essentially for free.
Product Images (Your Most Important Asset)
Now we arrive at the single most important part of your entire listing: your product images. When customers search on Amazon, the first thing they see is your main image. If that image does not pop, if it does not physically stop their thumb, they scroll straight past you and buy from someone else. It does not matter how good your title, bullets, or description are if nobody ever clicks.
How to Design a Main Image That Wins
Start by making sure your image visually matches what people are searching for. This sounds obvious, but almost nobody does it. For our eyebrow pencil, the packaging literally says “Eyebrow Pencil for Men” in big, bold letters across the front. When a man searches that phrase and sees packaging that says exactly that, the match is instant and undeniable.
Next, study what your competitors are doing, and then deliberately do the opposite. If every competitor uses soft pastel pinks and whites, go dark, matte, and black. If every competitor uses thin, minimal typography, go bold and confident. Differentiation is not decoration. It is the entire reason a shopper’s eye lands on you instead of the eight identical listings surrounding you.
Amazon does require your main image to sit on a pure white background, and that rule is non-negotiable. However, everything else inside that frame is yours to control. The product, the packaging, the color, the angle, the lighting, the typography – all of it can and should stand out.
Search “eyebrow pencil for men” right now and look at the results. Most of them look nearly identical: same pastel packaging, same tip style, zero differentiation. Then look at the best seller. Bold black handle, clean lighting, premium feel. That is precisely why it is the best seller, and it charges more than its competitors while doing it. That tiny branding decision is frequently the entire reason one product wins and another dies.
Use All 8 Secondary Image Slots
Beyond your main image, Amazon lets you add up to eight additional images, and you should use every single one. Remember, a shopper cannot pick up your product, feel the weight, or inspect the tip. The only way they can judge it is through your images. Therefore, your image stack is not a gallery. It is the product experience.
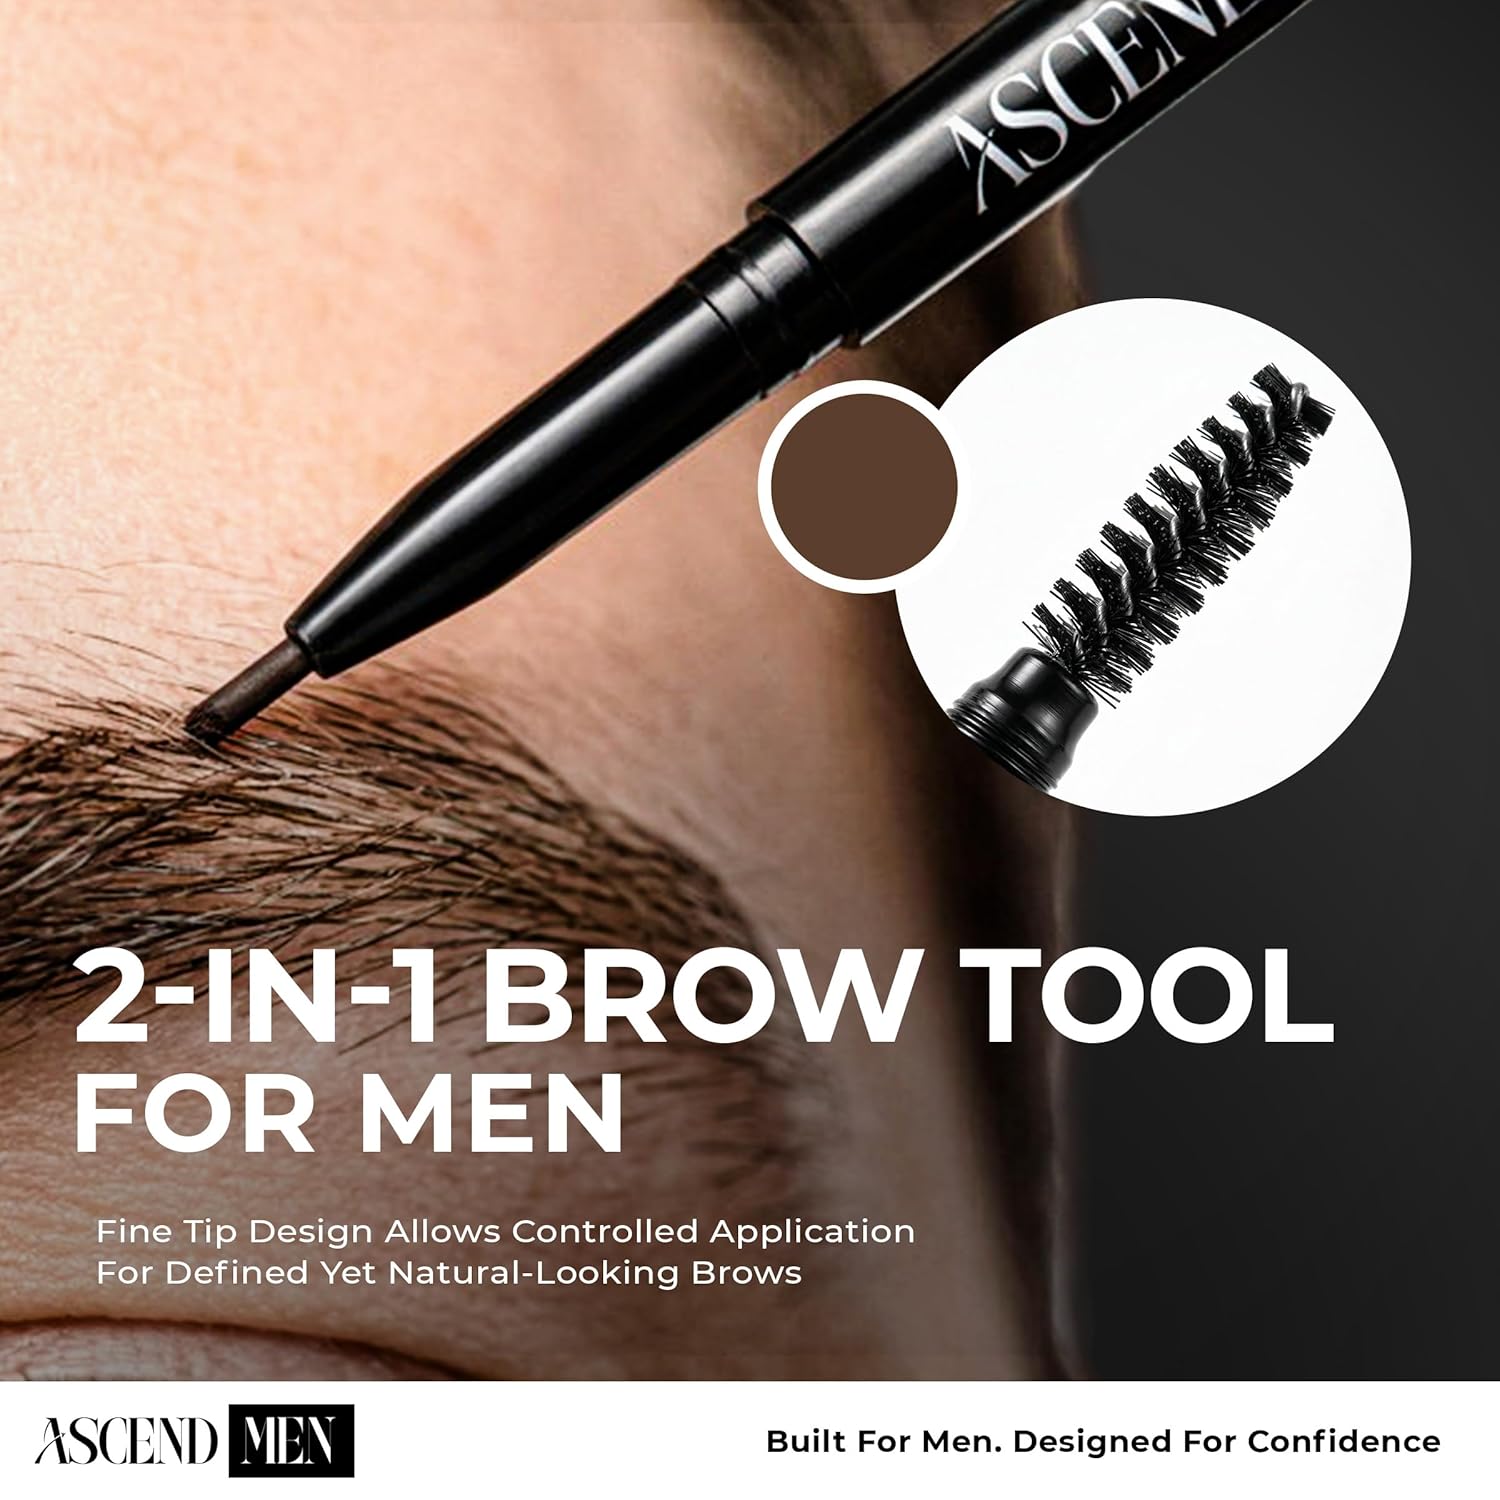
For the eyebrow pencil, image two is a tight close-up showing the ultra-fine tip and the built-in spoolie brush, so buyers see exactly what they are getting. Image three is a lifestyle shot of a guy applying it in front of a mirror, so they can picture how it looks on a real face rather than in a studio.
Image four is a side-by-side comparison chart against the current best seller, showing exactly where our pencil wins on tip precision, color match, and waterproof finish. This image does more selling than almost any other, because it makes the choice explicit. Image five shows the packaging itself, so customers know precisely what arrives in the box and feel confident before they commit.
Every additional image answers an objection or reinforces a benefit. Leave slots empty, and you are leaving those objections unanswered.
Case Study – The $10,000 Image Mistake

One of my students, Mina, learned this lesson the expensive way. When he launched his brand, he used the low-quality photos his supplier handed him. They were technically accurate. They showed the product. And they were completely, catastrophically flat.
His listing died. For roughly a month, it generated almost nothing, and he could not figure out why. Everything else looked fine on paper. By the time he identified the real problem, he estimated he had lost around $10,000 in potential sales.
Then he reshot the images properly, upgraded to premium packaging, and relaunched with professional creative. Almost immediately, his sales picked up. Same product, same price, same keywords. Different images.
Framed positively, this is genuinely good news. Images are the highest-ROI fix available in your entire listing, and unlike ranking, you can improve them today.
Consider CGI and Professional Listing Design

These days, many of the top sellers do not photograph their products at all. They use computer-generated images instead, because CGI lets you capture angles, cutaways, and environments that a physical photographer simply cannot produce. The results usually look more polished, more consistent, and more premium.
Honestly, if this entire process sounds like a lot, you do not have to do it yourself. I personally use FBA Creatives for all of my branding, my logos, and my full listings, even though I have been doing this for a decade. They handle titles, main images, secondary images, and bullet points, and crucially, they use real search data to research what customers are actually typing before they design anything. The result is a listing optimized from the ground up rather than decorated after the fact.
Product Details and Pricing Strategy

Once your images are uploaded, Amazon takes you to the product details page. The first question asks who manufactures your product. This one is simple: enter your brand name. For our example, that is Ascend Men. Then Amazon asks for the number of items, which simply means how many units come in a single package. For the eyebrow pencil, that is one.
Next comes pricing, and this is where sellers either leave enormous money on the table or lose thousands before they ever ship a unit.
The 3x Pricing Rule
My rule is refreshingly simple. Take what you pay for your product and multiply it by three. That is your absolute minimum starting retail price. You can absolutely go higher, and often you should, but you should never seriously consider going lower, because your margins have to absorb Amazon fees, advertising, returns, and inventory costs.
After you establish that floor, look at what your competitors charge. Then resist the instinct to automatically undercut them. Sometimes pricing above your competitors actually makes more sense, because a higher price signals higher quality, especially in categories like grooming, supplements, and premium goods.
Once sales start coming in, run real price tests. I discovered this firsthand with Carnivore Electrolytes. Initially, I planned to sell at $24.99. Then we raised it to $29.99. Sales held steady. So we went to $34.99. Sales held. Then $37.99. Sales still held. Our volume never dropped, but our profit roughly doubled. Had I never tested, I would have left all of that on the table permanently.
For the eyebrow pencil, we set the retail price at $12.97, because this is a premium grooming product, not a dollar-store impulse buy, and the price should communicate that instantly. Also, do not skip the list price field. Set your list price higher than your sale price, and Amazon will display a crossed-out strikethrough next to your price. Shoppers perceive a deal, urgency increases, and conversion follows.
The Hidden “All Attributes” Settings Most Sellers Miss

Before you click “Save and Finish,” stop. There is a section called “All Attributes,” and almost every new seller scrolls right past it. Inside that section sit settings that can genuinely double your organic reach if you configure them correctly. This is the part that separates professionals from beginners.
Hidden Setting #1 – Offer Start Date
The first setting is the offer start date. By default, your listing goes live the moment Amazon approves it. That sounds convenient, but it is actually a mistake, because a brand-new listing with zero reviews and zero sales history is effectively invisible.
Instead, set a specific future date. Then, on that date, launch deliberately. Drive a burst of traffic to your listing all at once, from an email list, a social following, a launch group, or paid promotion. Here is why this works: when Amazon sees a sudden burst of sales, it concludes your product is a winner and pushes you higher in the search results. The higher you rank, the more organic sales you get. The more sales you get, the higher you rank. That feedback loop is the snowball that builds real businesses.
Carnivore Electrolytes is my proof. Month one, we did roughly $7,000 in sales. Month two hit $10,000. Then $15,000, then $20,000. For several months after that, we ran between $30,000 and $40,000, and by around month ten, we crossed $100,000 in monthly sales. That is not luck. That is the snowball doing exactly what it is designed to do.
If you do not have an email list or a social following yet, do not panic. Just start building one today, because launch day traffic is the fuel that ignites the entire engine. I cover this launch strategy in far greater depth inside the Passion Product Accelerator.
Hidden Setting #2 – Back-End Keywords
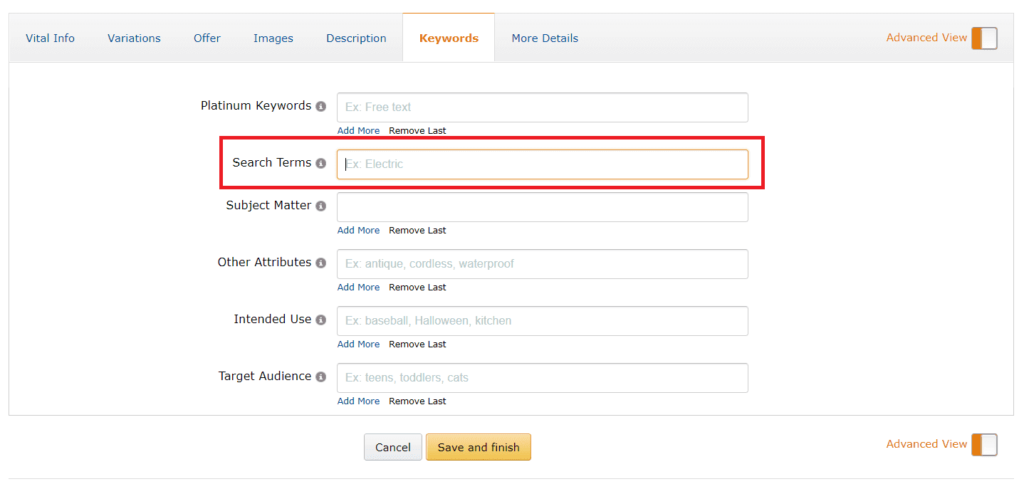
The second hidden setting is the keyword field, commonly called back-end keywords. This is where you tell Amazon exactly which search phrases you want to rank for. Critically, customers never see this field, which means you have total freedom.
Consequently, use this space aggressively. Stuff in every relevant variation, synonym, misspelling, and long-tail phrase that you could not naturally fit into your title without making it read like a robot wrote it. Nothing here has to sound pretty. It only has to be relevant.
For the eyebrow pencil, we entered phrases like “natural brow pencil for men,” “men’s grooming pencil,” “subtle brow pencil for guys,” “dark brown brow pencil for men,” and “sparse brow filler men.” Amazon indexes all of them.
As a result, you suddenly start ranking for dozens of phrases you never put in your title, capturing traffic your competitors never even knew existed. It costs you nothing but ten minutes of effort.
The Final Step – Getting Inventory Into Amazon’s Warehouse

At this point, your listing is genuinely ready. Your title is optimized, your bullets sell benefits, your images stop the scroll, your pricing protects your margin, and your hidden settings are quietly working in your favor.
However, a perfect listing with no inventory in Amazon’s warehouse sells absolutely nothing. The final step, therefore, is physically getting your product into the FBA network so Amazon can start fulfilling orders on your behalf.
I am not going to cram a full shipping tutorial into this guide, because it deserves its own deep dive. But as soon as our eyebrow pencils arrive from the manufacturer, I am documenting the entire shipping process, start to finish, on my YouTube channel.
If you want to follow along with a real product launch in real time, that series covers everything: product research, finding a manufacturer, setting up your business legally, listing creation, and shipping into Amazon.
Why the Passion Product Formula Makes All of This Work
Let’s zoom out for a second, because the mechanics matter far less than the strategy behind them. Everything I just walked you through is the mechanism. It is how you execute. But the product you choose to execute on is the leverage, and leverage is what actually determines your outcome.
Niche branding beats generic private label for one simple reason: when you sell a commodity, your only competitive lever is price, and price wars destroy margins for everyone involved. But when you build the ideal product for a specific, underserved person, you compete on relevance instead. You charge more, convert better, earn genuine reviews, and build a brand that customers actually remember.
That is the entire Passion Product Formula. You build a brand around something you understand and care about, inside a niche with proven search demand and weak, generic competition. Then you execute the listing correctly, launch with a bang, and let the snowball do its work. It is how I built Carnivore Electrolytes. It is how I built a brand in seven days that generated $1.4 million and sold for $840,000. And it is how thousands of my students have built their own.
Here is the genuinely exciting part: 2026 is one of the best windows I have ever seen for new sellers. The keyword data is more accessible than ever, professional-grade creative is cheaper than ever, and enormous niches remain wide open because the incumbents are lazy. You are not late. You are early to the right approach.
Your Next 90 Days on Amazon Start Right Now

Let’s recap the path. First, set up your seller account and get into Seller Central. Next, choose your path, and choose the one that builds an asset. Then research your keywords with Helium 10 and write a title that leads with your highest-volume phrase. After that, select your category, configure your variations, register your brand, and buy a legitimate UPC from GS1.
From there, write a benefit-driven description, structure five bullets around five distinct reasons to buy, and invest heavily in images that look nothing like your competitors. Set your price at a minimum of 3x your cost, and test upward relentlessly. Finally, open the All Attributes section, set a strategic launch date, and load your back-end keywords.
You do not need to be an expert to do this. You need to follow the steps in order and avoid the small handful of mistakes that quietly kill new listings. That is genuinely it.
If you want personalized help, my team and I are running free strategy calls right now. On the call, we will map out exactly what your next 90 days on Amazon should look like, and we will see whether the Passion Product Accelerator is a fit for you. Inside the Accelerator, you get a dedicated coach, one-on-one strategy sessions, and small group coaching with me and my team. Spots are limited because the calls are with me and my best coaches, so apply while they are open.
Frequently Asked Questions
How much does it cost to start selling on Amazon FBA in 2026?
Costs vary widely depending on your product, but a realistic starting budget covers your Amazon seller account subscription, your initial inventory order from a manufacturer, a legitimate UPC code from GS1 at roughly $30, a trademark filing for Brand Registry, and your listing creative. Many sellers launch successfully with a few thousand dollars, and starting with a lower-cost, lightweight product keeps that number manageable.
Should I choose FBA or FBM as a new seller?
For the overwhelming majority of sellers, FBA is the right call. FBA makes your product Prime eligible, which matters enormously given Amazon’s 300+ million Prime members who overwhelmingly buy Prime-eligible products. FBA also removes packing, shipping, and customer service from your plate entirely, which is what makes the business genuinely scalable.
Do I really need a trademark to sell on Amazon?
You can technically sell without one, but you should get one if you are building your own brand. A trademark unlocks Amazon Brand Registry, which gives you A+ Content, priority search placement, protection against knockoff listings, and easier shipping into FBA. You can file affordably through uspto.gov, and the benefits far outweigh the cost.
How many keywords should I put in my Amazon title?
There is no magic number, but you should lead with your single highest-volume search phrase and then work in as many relevant secondary keywords as you can without making the title unreadable. Remember that customers see your title, so it needs to sound natural. Anything that does not fit gracefully belongs in your back-end keyword field instead.
Where should I buy a UPC code for my Amazon product?
Buy directly from GS1 at gs1.org, which is the official issuing authority. GS1 now sells single UPC codes for around $30 rather than forcing you into packs of ten. Avoid the discount resellers offering codes for $10, because those codes are frequently invalid or recycled and can get your listing suspended.
How many product images should I upload?
Use every slot Amazon gives you. That means one main image on a white background plus up to eight additional images. Since shoppers cannot physically handle your product, your images are the only way they can evaluate it. Include close-ups of key features, a lifestyle shot showing the product in use, a comparison chart against the top competitor, and a packaging shot.
Why should I set a future launch date instead of going live immediately?
Because a brand-new listing with no sales and no reviews is invisible in Amazon search. By setting a specific future start date, you can coordinate a concentrated burst of traffic on day one. Amazon interprets that sales spike as a signal that your product is a winner and pushes you higher in the rankings, which triggers the compounding snowball of organic sales.
What is the Passion Product Formula?
The Passion Product Formula is the niche branding approach behind everything in this guide. Instead of selling a generic commodity and competing purely on price, you build a branded product for a specific, underserved audience inside a market with proven demand and weak competition. It lets you charge premium prices, convert at higher rates, and build a real brand asset you can eventually sell.