
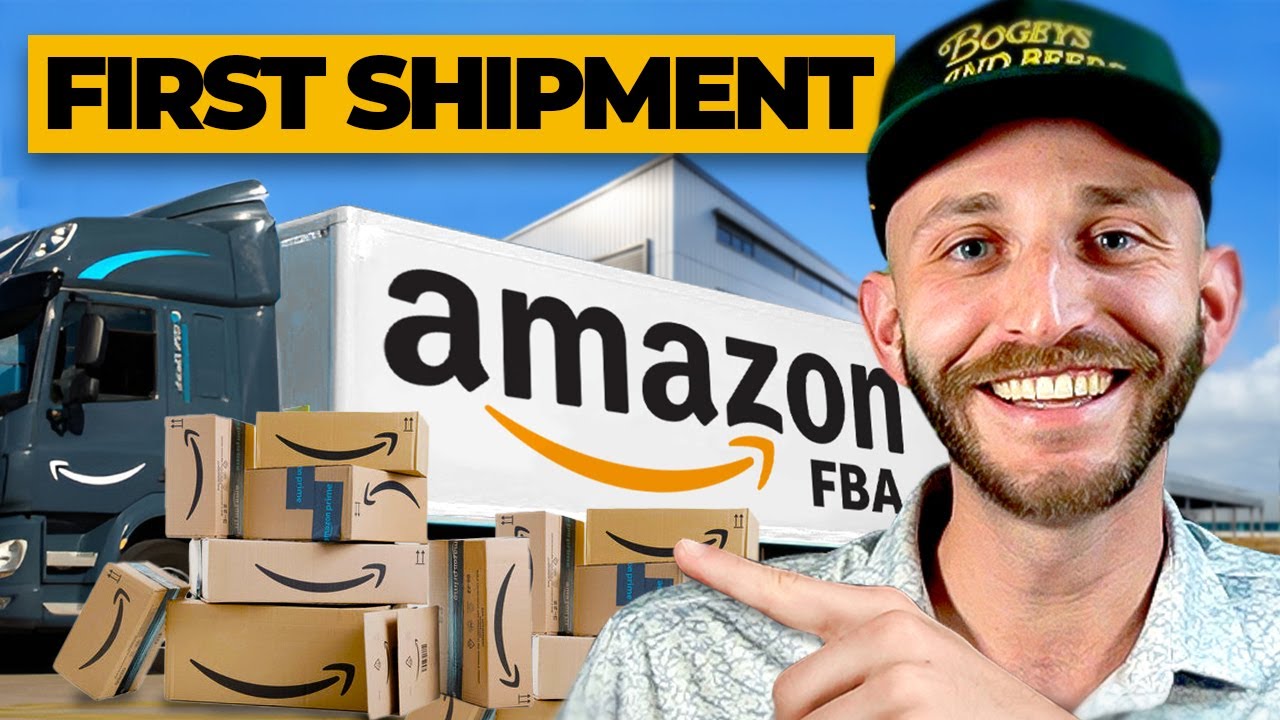
Receiving your inventory from the manufacturer is a major milestone, but taking the next step to prepare your Amazon FBA shipment can feel daunting for new sellers. Between mastering complex shipping requirements, understanding the labeling system, and selecting the right delivery method, there are several logistical hurdles to clear before your products can start generating sales. However, getting this process right is essential, as proper preparation ensures your inventory becomes available to customers quickly and without issues.
Fortunately, the shipping process follows a logical sequence that becomes second nature once you have navigated it a few times. By understanding the workflow from the start, you can avoid the costly mistakes and operational bottlenecks that often trap beginners. Throughout this guide, we will walk you through every critical step successful sellers use, sharing best practices and highlighting common pitfalls to help you streamline your operations and save both time and money.
While this guide provides a comprehensive overview of getting your goods to the warehouse, the Passion Product Formula offers a deeper dive with over 100 detailed tutorials covering every aspect of the Amazon FBA business model. From the basics of shipping to the complexities of scaling your operations, these in-depth materials are designed to help you master the entire ecosystem. Whether you are just starting or looking to refine your strategy, utilizing these resources will help you build a solid foundation for a profitable Amazon business.
- Getting Started: Accessing Your Seller Central Account
- The Ship From Address: A Critical First Decision
- Understanding Marketplace Destinations and Case Pack Templates
- Product Preparation Requirements: Getting It Right
- Mastering the Labeling System: FNSKU and Beyond
- Configuring Your Shipment Details
- Choosing Your Shipping Method: Small Parcel vs. LTL
- Printing and Applying Labels Correctly
- Executing the Shipment and Tracking
- Advanced Tips and Troubleshooting
- Your Journey to Amazon FBA Success Starts Here
- Frequently Asked Questions
Getting Started: Accessing Your Seller Central Account

Before you can ship anything to Amazon, you’ll need to navigate through your Seller Central dashboard to set up your shipment. First, head over to sell.amazon.com and log in with your seller credentials. Once you’re inside, you’ll find yourself at the main dashboard. This serves as your command center for managing every aspect of your Amazon business.
Next, locate and click on the “Manage Inventory” tab in the main navigation menu. This section displays all the products currently listed in your Amazon catalog. As you scroll through your inventory, find the specific product you want to send to Amazon’s warehouse. You’ll notice a small dropdown menu next to the “Edit” button for each product listing.
Click on that dropdown menu and select “Send/Replenish Inventory.” This action launches Amazon’s shipment creation workflow. The system will guide you through the remaining steps. You’ll configure all the details about what you’re sending, where it’s coming from, and how it will arrive at the fulfillment center.
Take the time to familiarize yourself with this navigation process. You’ll repeat it every time you send inventory to Amazon. Understanding where everything is located in Seller Central will make you a more efficient seller overall. You’ll manage your business with confidence and spend less time searching for basic functions.
The Ship From Address: A Critical First Decision

Why This Address Matters More Than You Think
One of the most important decisions you’ll make during the shipment setup process is selecting the correct ship-from address. This seemingly simple step is where many new sellers make costly mistakes. These errors result in unnecessary expenses and delays. Amazon uses this information to determine which fulfillment center should receive your products, so accuracy here is absolutely essential.
When the ship-from address field appears, you have two primary options to consider. If you’re shipping from your own home or business location, you’ll enter that address. However, if you’re shipping directly from your manufacturer’s facility, you must enter the manufacturer’s address instead. Many sellers mistakenly leave their own address in this field even when products ship from overseas. This creates significant logistical confusion.
The Real Costs of Getting It Wrong
The consequences of entering the wrong address extend beyond simple inconvenience. Amazon’s system routes shipments based on proximity and warehouse capacity. An incorrect address might send your products to a fulfillment center that’s much farther from the actual shipping origin than necessary. You could face higher shipping costs, longer transit times, and potential delays in getting your products available for sale.
Fortunately, Amazon allows you to verify and change the ship-from address if you notice an error. Simply click the “Change” option next to the address field to update the information. Always double-check this detail before proceeding, especially when working with manufacturers who handle fulfillment on your behalf. Getting this right from the start ensures smooth logistics and helps you avoid the headaches that come with misdirected shipments.
Understanding Marketplace Destinations and Case Pack Templates

Selecting Your Marketplace
After confirming your ship-from address, you’ll need to specify your marketplace destination. For most sellers starting out, this decision is straightforward. If you’re selling exclusively in the United States, you’ll select “United States” as your marketplace. Amazon operates in multiple countries, so this selection ensures your inventory arrives at the appropriate regional fulfillment network.
Once you’ve chosen your marketplace, the next step involves creating what Amazon calls a “case pack template.” This template describes the physical characteristics of the boxes you’ll send to Amazon. It includes dimensions, weight, and the number of individual units packed inside each case. Think of it as creating a profile for your packaging that Amazon can reference for handling and storage purposes.
Amazon’s Strict Packaging Requirements
Creating an accurate case pack template is critical because Amazon has specific requirements you must follow. No single side of your box can exceed 25 inches in length. The total weight cannot surpass 50 pounds per case. Additionally, Amazon limits you to a maximum of 150 units per case, regardless of how small those units might be. These restrictions exist to ensure warehouse workers can safely handle your shipments. They also help automated systems process packages efficiently.
When setting up your template, give it a clear, descriptive name that you’ll recognize later. Include details about your packaging dimensions and the exact quantity of units per case. For example, if you’re shipping hats and each case contains 100 units weighing approximately 25 pounds total, make sure you record these specifics accurately. This information becomes part of your permanent seller account. It makes future shipments faster to set up while ensuring compliance with Amazon’s warehouse standards.
Product Preparation Requirements: Getting It Right
Standard vs. Special Preparation Needs
Before your products can enter Amazon’s warehouse, they must meet specific preparation requirements. These requirements vary depending on your product category. Most standard products require minimal preparation. You’ll typically select the “No extra prep needed” option during the shipment setup process. However, understanding when additional preparation is necessary can save you from shipment rejections and delays.
Certain product categories demand extra attention and preparation steps. Baby products, adult items, fragile goods, and liquids often require special packaging. These items must meet Amazon’s safety and handling standards. For instance, many products need poly bags that meet specific thickness requirements. These bags must include suffocation warnings when appropriate. These requirements aren’t arbitrary, they protect both Amazon’s warehouse workers and your end customers.
Real-World Preparation Examples
Let’s consider a practical example to illustrate these differences. A golf tee-based drinking game might not require any additional packaging beyond its original box. In contrast, hats or apparel items typically need individual poly bags. These protect them from dust and damage during storage and shipping. Similarly, if you’re selling supplements or liquid products, you may need additional sealing or protective packaging. This prevents leaks and contamination.
Take the time to understand your specific product’s preparation requirements. This represents an investment in your business’s success. The Passion Product Formula provides detailed guidance on category-specific requirements. You can navigate these regulations without confusion. Remember, improper preparation can result in Amazon rejecting your entire shipment. You’ll pay for return shipping and restart the process, a costly mistake that’s entirely preventable with proper planning.
Mastering the Labeling System: FNSKU and Beyond

Understanding FNSKU Labels
Understanding Amazon’s labeling system is absolutely essential for successful FBA operations. The most important label you’ll encounter is the FNSKU label. This stands for Fulfillment Network Stock Keeping Unit. This unique barcode identifies your specific product within Amazon’s vast fulfillment network. It ensures that when a customer orders your item, the correct unit gets picked, packed, and shipped.
Every individual unit you send to Amazon must have an FNSKU label attached to it. You have three options for handling this requirement, each with different cost implications. First, you can print the labels yourself and manually apply them to each unit. This is time-consuming but gives you complete control. Second, you can have your manufacturer apply the labels during production. This is the most efficient option for most sellers. Third, you can pay Amazon to label your products at a cost of 50 cents per unit. This seemingly small fee quickly adds up and significantly eats into your profit margins.
The Smart Way to Handle Labeling
The math here is straightforward and compelling. If you’re sending 1,000 units to Amazon and choose their labeling service, you’ll pay $500 just for labels. In contrast, most manufacturers will apply FNSKU labels for a fraction of that cost. They often charge just a few cents per unit. Having your manufacturer handle labeling is almost always the most cost-effective approach. You’ll save both money and the physical labor of applying thousands of labels yourself.
Beyond FNSKU labels, you’ll also need to understand the two types of shipping labels required for each box you send. The first is the carrier shipping label, such as a UPS or FedEx label. This allows the shipping company to track and route your package. The second is the Amazon FBA ID box label. Amazon uses this to identify and track your shipment once it arrives at their facility. Both labels must be clearly visible and scannable. Proper placement without tape covering the barcodes is crucial. Master this labeling system from the beginning, and you’ll avoid delays. Your inventory will get processed quickly upon arrival.
Configuring Your Shipment Details
Entering Accurate Quantities
With your preparation and labeling requirements understood, it’s time to configure the specific details of your shipment. First, you’ll need to tell Amazon exactly how many boxes or cases you’re sending in this shipment. Accuracy here is important because Amazon expects to receive the exact quantity you specify. Discrepancies can cause problems with your inventory reconciliation.
Next, you’ll select a ship date. This represents when you plan to hand off your packages to the carrier or when they’ll be picked up. Amazon uses this information to estimate arrival times and allocate warehouse capacity accordingly. While you have some flexibility with ship dates, choose realistic dates rather than optimistic ones. Selecting a date you can actually meet helps maintain a good relationship with Amazon. It ensures your inventory arrives when expected.
Confirming and Tracking Your Shipment
After entering your quantities and ship date, you’ll click “Confirm and Continue” to proceed to the next stage. At this point, Amazon’s system generates the necessary documentation. It assigns your shipment to specific fulfillment centers. Depending on where you’re shipping from and current warehouse capacity, your inventory might go to a single location. Alternatively, it might be split across multiple facilities. Amazon makes this decision automatically based on their logistics network.
Throughout this process, maintain accurate records for managing your business effectively. Keep track of shipment numbers, dates, quantities, and destinations for future reference. These records become invaluable when reconciling inventory, investigating lost shipments, or analyzing your operational efficiency. As you send more shipments over time, you’ll develop a rhythm. This makes the configuration process quick and routine. You’ll focus on growing your business rather than wrestling with logistics.
Choosing Your Shipping Method: Small Parcel vs. LTL

Small Parcel Delivery for Beginners
Amazon offers two primary shipping methods for getting your inventory into their warehouses. Choose the right one based on the volume you’re sending. Understanding the differences between these options will help you make cost-effective decisions. Your choice should align with your business stage and inventory levels.
Small parcel delivery is the method most new sellers start with. You’ll use carriers like UPS, FedEx, USPS, or DHL. This option works well when you’re sending a smaller number of boxes that you can easily handle yourself. You can either drop off your packages at a carrier location or schedule a pickup at your address. One significant advantage stands out: Amazon has negotiated exceptional rates with shipping carriers. You’ll pay considerably less than if you shipped the same packages independently. When testing new products or starting your business, small parcel delivery offers flexibility and accessibility. You won’t need specialized equipment or freight knowledge.
Graduating to LTL Freight
As your business grows and you begin ordering larger quantities, you’ll eventually reach a point where less than truckload (LTL) shipping becomes more economical. LTL is designed for shipments involving pallets of inventory. Typically, you’ll use this when you’re sending hundreds or thousands of units at once. Instead of dropping off individual boxes, a freight carrier will send a truck to your location. They can also pick up from your manufacturer’s facility. They’ll pick up your palletized shipment and deliver it directly to Amazon’s warehouse.
The transition from small parcel to LTL represents an important milestone in your Amazon business. While LTL shipping requires more planning and coordination, it dramatically reduces your per-unit shipping costs. This matters most when dealing with larger volumes. Additionally, working directly with freight carriers opens up new possibilities for efficiency. This is especially true when shipping directly from overseas manufacturers. The Passion Product Formula provides detailed guidance on when to make this transition. You’ll learn how to navigate the more complex world of freight shipping. This ensures you’re always using the most cost-effective method for your current business scale.
Printing and Applying Labels Correctly

Preparing Your Labels
Once you’ve configured your shipment and selected your shipping method, it’s time to generate and apply the necessary labels to your boxes. This step requires careful attention to detail. Improperly labeled packages can cause significant delays. In some cases, Amazon may even reject them at the receiving docks. Start by printing all required labels directly from your Seller Central account. Ensure your printer produces clear, legible barcodes.
Before applying any labels, take a moment to verify all the critical information. Double-check that the ship-from address matches your actual shipping location. Confirm the ship-to address corresponds to the correct Amazon fulfillment center. Verify that package weights and dimensions are accurate. These details might seem mundane, but errors here can cascade into bigger problems. You could experience lost shipments or incorrect inventory placement.
Best Practices for Label Application
When applying labels to your boxes, follow some essential best practices. These will prevent scanning issues. First, place labels on a flat surface of the box. Never put them on corners, seams, or curved areas where they might wrinkle or peel. Second, ensure the entire label surface is smooth and firmly adhered to the box. Third, and most importantly, never cover any part of the barcode with tape. Don’t allow any other debris to obscure it. Both UPS and Amazon use automated scanners that must be able to read these barcodes clearly. Any obstruction can prevent proper scanning and tracking.
Consider preparing a few backup labels in case any get damaged during handling or application. Having extras on hand takes only a moment but can save you from scrambling if a label tears. It also helps if you accidentally cover one with tape. Additionally, take photos of your labeled boxes before shipping them out. This documentation can prove invaluable if any disputes arise about shipment contents or labeling compliance. These small preventive measures demonstrate professionalism. They protect your business from avoidable complications.
Executing the Shipment and Tracking
Getting Your Packages to Amazon
With your boxes properly labeled and ready to go, you’re now prepared to hand them off to your chosen carrier. If you’ve selected small parcel delivery, you can simply drop your packages at the nearest UPS store or carrier location. Alternatively, you can schedule a pickup. Contact the carrier directly or use the scheduling tools in your Seller Central account. This is especially convenient when you have multiple boxes. It also helps if you don’t have easy access to a drop-off location.
After your packages are in transit, Amazon provides comprehensive tracking tools within Seller Central. Navigate to the main menu, click on “Inventory,” and then select “Shipments.” You’ll see a complete list of all your shipments and their current status. This dashboard shows you which shipments are in transit. It displays which have been received and which are currently being processed at Amazon’s facilities.
Monitoring Your Inventory’s Journey
For detailed information about a specific shipment, click “Track Shipment” within the shipments tab. This view provides real-time updates about your package’s location and estimated delivery date. You’ll see when the carrier picks up your shipment. You’ll know when it’s in transit and when it arrives at the Amazon facility. Finally, you’ll see when it’s checked in and available for sale. This visibility gives you peace of mind. It allows you to anticipate when your inventory will be live and ready for customers to purchase.
Keep in mind that typical delivery timeframes vary based on your shipping method and distance from the fulfillment center. Small parcel shipments within the same region might arrive in just a few days. Cross-country shipments or LTL freight might take a week or more. Once your shipment arrives at Amazon, allow additional time for receiving and processing. Sometimes this takes a few hours, sometimes a day or two depending on warehouse volume. If your shipment experiences unusual delays or problems, Amazon’s seller support can help investigate and resolve issues.
Advanced Tips and Troubleshooting

Common Issues and How to Prevent Them
Even with careful planning, you’ll occasionally encounter challenges when shipping to Amazon’s warehouses. Understanding common issues before they arise helps you prevent problems. It also helps you respond effectively when they occur. One frequent issue involves rejected shipments due to preparation errors. Perhaps you didn’t properly bag products. Maybe you applied labels incorrectly, or box weights exceeded limits. Preventing these rejections requires careful attention to Amazon’s requirements before you ship.
Label scanning problems represent another common frustration for new sellers. When warehouse workers can’t scan your FNSKU or box labels, Amazon flags your shipment for manual processing. This delays inventory availability. This problem almost always stems from poor label placement. Tape covering barcodes or damaged labels during transit cause most scanning issues. Follow proper labeling procedures and use high-quality label printers. You can virtually eliminate these issues.
Learning and Improving Over Time
As you complete your first few shipments, treat each one as a learning opportunity. Take notes on what went smoothly and what caused confusion or delays. Many sellers find that their shipping process becomes dramatically more efficient after the third or fourth shipment. They internalize the workflow and develop their own systematic approach. Additionally, building strong relationships with your carriers and manufacturers pays dividends over time. Responsive partners who understand your needs make the entire process much smoother.
The Passion Product Formula community provides an invaluable resource when you encounter unique situations. You’ll get advice from experienced sellers. Rather than struggling alone with shipping challenges, you can tap into collective knowledge. You’ll connect with people who’ve solved similar problems. Whether you’re considering prep centers, scaling to larger shipment volumes, or dealing with special category requirements, comprehensive training helps. Community support transforms obstacles into manageable tasks. They won’t derail your Amazon business.
Your Journey to Amazon FBA Success Starts Here

You now have a comprehensive understanding of how to ship products to Amazon’s fulfillment centers. You know everything from initial setup through final delivery. While the process might seem complex when you first read through it, remember that each shipment gets easier. You’ll develop your own rhythm and routine. The key is starting with careful attention to detail, then building efficiency through repetition and experience.
Proper shipping procedures form the foundation of your Amazon FBA business. Inventory that’s stuck in transit or rejected at receiving can’t generate sales. Master these logistics, and you ensure that your products reach customers quickly and reliably. Moreover, the time you invest in understanding these systems pays off exponentially. As your business grows and you begin managing larger volumes of inventory across multiple products, you’ll be prepared.
If you’re serious about building a successful Amazon business, consider exploring the Passion Product Formula course. While this guide provides a solid overview of the shipping process, the course offers over 100 detailed, step-by-step tutorials. You’ll learn every aspect of Amazon FBA. From product research and sourcing to marketing and scaling, you’ll receive comprehensive training. The program turns beginners into confident, profitable sellers. The course goes far beyond basic overviews. It dives deep into strategies and tactics that separate struggling sellers from those who build sustainable businesses.
For those not quite ready to commit to the full course, Travis offers a completely free 10-hour YouTube video. It covers the fundamentals of creating your Amazon Passion Product. This extensive free resource demonstrates the value and depth of teaching available. You’ll get a taste of what comprehensive Amazon training looks like. Whether you choose the complete course or start with free resources, the most important step is taking action. Begin your Amazon FBA journey with the knowledge and confidence to succeed.
Frequently Asked Questions
How long does it take for my inventory to become available for sale after Amazon receives it?
Processing times vary depending on warehouse volume and your shipment size, but typically range from a few hours to 2-3 days. During peak seasons like Q4, processing may take longer. You can monitor your shipment’s receiving status in Seller Central. You’ll see exactly when units become available. If processing takes longer than expected, Amazon provides tools to open cases with warehouse support.
Can I send inventory from multiple locations in the same shipment?
No, each shipment must originate from a single ship-from address. If you have inventory in multiple locations, you’ll need to create separate shipments for each location. This is why accurately selecting your ship-from address is so important. Amazon’s system routes shipments based on that origin point.
What happens if Amazon receives fewer units than I specified in my shipment?
Amazon will update your inventory count to reflect what they actually received. They may investigate the discrepancy. If boxes were lost in transit, you can file claims with the carrier. If Amazon misplaced units, you can open a case to have them investigate. Always keep your tracking information and shipment documentation to support any disputes.
Should I use Amazon’s partnered carrier program or ship independently?
Amazon’s partnered carrier program almost always offers better rates than you can negotiate independently, especially when starting out. The partnered program also integrates seamlessly with your Seller Central account. This makes tracking and documentation easier. As you scale significantly, you might explore independent freight relationships. However, most sellers benefit from using Amazon’s negotiated rates.
Do I need to include packing slips or invoices inside my boxes to Amazon?
No, you should not include packing slips, invoices, or any marketing materials inside boxes shipped to Amazon’s fulfillment centers. Amazon only needs the exterior box labels, the FBA ID label and carrier shipping label. Any additional paperwork inside the boxes can cause confusion during receiving. It’s unnecessary for Amazon FBA shipment.
What should I do if my shipment shows as delivered but hasn’t been checked in?
It’s normal for there to be a delay between delivery and check-in, sometimes up to several days during busy periods. If your shipment shows as delivered for more than 72 hours without being checked in, you can open a case with Amazon seller support. They’ll investigate with the warehouse and update your inventory count accordingly.
Can I send products to Amazon before my listing is live?
Yes, you can send inventory before your product listing goes live, but it’s generally better to have your listing created first. Creating the listing first allows Amazon’s system to properly expect and categorize your incoming inventory. If you must send products before listing creation, you can create the listing while your shipment is in transit.
How do I know if my product requires special prep like poly bags?
Amazon provides detailed prep requirements during the shipment creation process. Additionally, you can check the “FBA Product Restrictions” page in Seller Central. You can also use Amazon’s Fee Preview tool to see prep requirements for your specific product. When in doubt, Seller Support can confirm whether your product requires additional preparation before shipping.


